 Circuit breakers regulate the flow of electricity through your home. They’re safety devices, designed to trip when your internal wiring experiences an unexpected surge of electricity, which can damage equipment and appliances, or even start a fire. Every room in your house is connected to a separate breaker. When one trips, power’s cut to whichever room it controls. Resetting the breaker is normally enough to restore power, but not always. When power doesn’t return, a faulty circuit breaker may be to blame. Determining whether your circuit breaker is working properly is surprisingly easy. Homeowners don’t even need professional help, though they may want it nonetheless. For anyone unfamiliar with electrical systems, here is how to test a circuit breaker.
Safety Precautions
You should always be cautious when working with electricity. Before testing a circuit breaker, follow a few basic safety measures to minimize risk to yourself and your home.
- Unplug all devices and appliances connected to the circuit. This prevents them from being damaged in the event of a sudden power surge when you restore electricity.
- Wear rubber soled shoes and insulated gloves. Rubber is a natural insulator, so it won’t conduct electricity. If you accidentally touch a live wire, rubber gloves and rubber soles will protect you from shock.
- Check for water around the breaker box. Water is an excellent conductor of electricity, so always make sure the breaker box components are dry and that there’s no excess moisture on the walls or floor nearby. It’s unlikely you’ll find any, but it’s better to be safe than sorry.
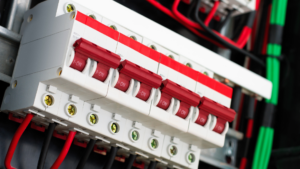
How to Test a Circuit Breaker
Before you start, make certain the test is necessary. Shut the breaker off then on again. Sometimes resetting it is enough to solve the problem. If power doesn’t return, you’ll need to determine whether the breaker is the issue. Testing it requires only a few pieces of equipment. Besides your protective clothing, you’ll also need a screwdriver and multimeter, a test tool that allows you to measure two or more electrical values. You can purchase one at most major hardware stores.
After gathering your equipment and identifying which circuit you want to test (every circuit in your breaker box should be labeled, indicating which part of the house it’s connected to), unscrew the frame around the breakers and expose the wires underneath. Next, get out your multimeter and switch it to “VOLTS AC.” The other setting, “VOLTS DC,” is designed to test batteries.
Multimeters have two prongs. The black one is neutral. It doesn’t carry any electrical voltage and plugs into common ports. The red one tests voltage, resistance, and frequency. It plugs into the port for the unit you’re measuring. Place the red prong against the terminal screw, attached to the wire running into the breaker, and place the black prong against the ground screw, the metal bar on the right side of the breaker box. If the breaker is functioning, the meter should read 120 or 240 volts, the standard current for a residential electrical circuit. A reading lower or higher means the circuit breaker is defective.
Test for Continuity
Only a closed, complete circuit can create a constant and uninterrupted flow of electricity, also known as continuity. Testing for continuity tells you whether the breaker is conducting electricity the way it was designed. To test continuity, first set your multimeter to “OHM” (Ω) and deactivate the circuit. Place the red prong on the screw terminal and the black prong on the output terminal.
The meter will send a small electrical signal through the circuit. If it’s closed, you’ll hear a beep. If it’s open, you won’t hear anything. Open circuits aren’t dangerous, but they’re effectively dead. This could be the result of a broken wire, loose connections, or poor installation. Regardless, you’ll need to bring in a professional to either repair the circuit or replace it.
Save on Electrical Repairs with Agway
Your circuit breakers and internal wiring play a central role in the life of your home. Unfortunately, like everything else in your house, they’re vulnerable to wear and tear. Repairing faulty electrical equipment can be expensive and home insurance won’t cover the cost. But Agway’s EnergyGuardTM Program will.
EnergyGuardTM protects your heating, cooling, and electrical systems* from damage caused by frequent use. When the need for repair occurs, our customers don’t waste time searching for a qualified technician. We maintain a network of local contractors and will send the first available one to your home as fast as possible. There are no deductibles or service fees. We pay for the visit and the cost of all covered parts. Don’t let an unexpected problem upset your budget. Sign up and start enjoying the benefits of EnergyGuardTM today!
*Coverage depends on the commodity purchased.