
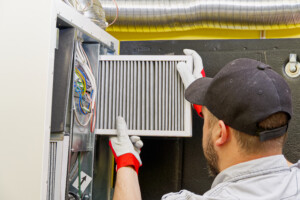
 Your furnace works hardest during the coldest months of the year, so a little preparation before temperatures drop can go a long way. A seasonal tune-up can improve performance, catch developing issues, and reduce the risk of losing heat when you need it most.
In this article, we’ll share 15 steps you can safely do at home to prepare your system for cold weather.
How Often Should You Tune Up Your Furnace?
Most furnaces should receive a professional tune-up at least once per year, usually before the heating season begins. Scheduling service in late summer or early fall should give you enough time to address any needed repairs before cold weather arrives.
Annual furnace cleaning and maintenance can help keep dust, corrosion, worn parts, and performance issues from going unnoticed. Regular service also supports more consistent heating and can help maximize your HVAC’s lifespan. However, you should still perform basic at-home maintenance throughout the year, such as regularly replacing your air filter and keeping the area around the furnace clear.
Homeowner-Safe Furnace Tune-Up Steps
Start by reviewing the manufacturer’s instructions for your specific system, then follow these steps to perform a full furnace tune-up.
1. Turn Off Power
Turn off your furnace using its service switch or the appropriate breaker in your electrical panel before cleaning or inspecting any equipment. This is necessary to prevent electrical shock or accidental startup as you work. If you can’t confidently identify the correct switch or breaker, stop and contact an HVAC professional for assistance.
2. Replace or Clean the Air Filter
Dirty air filters can restrict airflow and force your furnace to work harder to circulate warm air. Depending on your filter type and household conditions, you may need to clean or replace your filter every 1-3 months.
Check your filter’s dimensions and airflow direction before purchasing and installing a replacement. Correctly replacing your furnace’s filter can help restore proper airflow and prevent your system from working harder than necessary.
3. Check and Calibrate the Thermostat
Make sure your thermostat responds correctly when you raise the temperature setting. If it doesn’t, replace the batteries and confirm that the thermostat is set to heating mode.
Compare the displayed temperature with a separate indoor thermometer. A technician may need to recalibrate or replace the thermostat if there’s a significant difference in readings.
4. Inspect Vents and Registers for Blockages
Walk through your home and check the supply vents and return registers. They should be open and unobstructed, as consistent airflow can help your furnace distribute heat more effectively. Rugs, curtains, furniture, and storage boxes can restrict airflow and make rooms harder to heat.
If you see any dust on the grilles, vacuum it off but avoid pushing tools deep into the ductwork.
5. Check the Flue or Exhaust Vent
Inspect the visible portion of your furnace exhaust vent for any obvious damage, loose connections, nests, leaves, or other obstructions. High-efficiency furnaces may vent through PVC pipes along an exterior wall.
Don’t dismantle or repair the vent yourself. If you notice any corrosion, gaps, or damage, contact a professional immediately.
6. Look at the Pilot Light or Ignition Flame
If your gas furnace has a visible pilot light or burner flame, it should appear steady and blue. A yellow, orange, weak, or flickering flame may indicate an issue with combustion or ventilation.
Don’t attempt to adjust the burner or gas supply. Turn off the furnace and contact a qualified technician if the flame appears different than usual.
7. Clean Around the Blower and Furnace Cabinet
Remove dust, pet hair, boxes, paint, cleaning products, and other materials from the area surrounding the furnace. Keeping the space clear can improve airflow and reduce the risks associated with combustible items stored near heating equipment.
Carefully vacuum loose dust from the exterior cabinet and nearby floor, but avoid opening any internal compartments unless the manufacturer specifically says they’re homeowner-accessible.
8. Test Your Carbon Monoxide Detector
Every home with fuel-burning equipment should have working carbon monoxide detectors. Test each unit and replace batteries as needed. Check the manufacturer’s guide for official replacement dates.
Place detectors throughout your home according to local requirements and manufacturer instructions, especially near sleeping areas. If a carbon monoxide alarm sounds, leave your home immediately and contact emergency services from a safe location.
9. Inspect Visible Ductwork
Examine the accessible ductwork in your basement, attic, garage, or other utility spaces. Heated air can escape through leaky ducts before it even reaches your living space, so look for any disconnected sections, visible gaps, damaged insulation, or loose joints. A qualified HVAC contractor can test and seal your system if you suspect any major damage or air loss.
10. Listen for Unusual Noises
Restore power to the furnace and run it through a complete heating cycle. Listen for any banging, rattling, squealing, grinding, or other sounds that are different from normal operation. Some noises may come from loose panels or expanding ductwork, but persistent unfamiliar sounds may be the result of issues with your blower, motor, belt, or burner. If you hear these types of sounds, schedule service with an HVAC professional to diagnose the issue.
11. Check the Condensate Drain Line
High-efficiency furnaces produce condensation that drains through a tube or pipe. Check this line for kinks, leaks, algae buildup, standing water, or an obvious blockage. A clogged drain can cause water damage or trigger a system shutdown. If the line is difficult to access or repeatedly clogs, call a technician to inspect and clean it.
Professional-Only Furnace Tune-Up Steps
A full furnace tune-up requires specialized tools and training. A qualified technician can safely check combustion, electrical, mechanical, and ventilation components that homeowners aren’t qualified to handle themselves. Contact a licensed HVAC contractor to:
12. Inspect the Heat Exchanger
The heat exchanger separates combustion gases from the air circulating through your home. A technician can check it for cracks, corrosion, separation, and other damage that can allow carbon monoxide to escape.
Because many areas of the heat exchanger are difficult to access, this inspection often requires specialized equipment. Any damage to your heat exchanger is a serious safety concern and must be addressed immediately after discovery.
13. Clean Burners and the Combustion Chamber
Dust, soot, rust, and other debris can interfere with proper combustion. A technician can clean your burners and combustion chamber while checking the flame pattern and burner operation.
Because this work involves fuel-burning components, it should never be performed by a homeowner. Always contact an HVAC professional for this step, as incorrect handling can result in gas leaks or unsafe combustion.
14. Test Gas Pressure, Combustion, and Ignition
An HVAC professional can measure gas pressure, analyze combustion, and verify that the ignition system operates safely. These tests can help identify any issues with fuel delivery, ventilation, ignition timing, and burner performance.
Because a faulty component can cause inconsistent heating or prevent the system from starting, you may be able to recognize the signs of ignition issues, such as a bad furnace valve, but you should leave testing and replacement to a trained technician.
15. Check Electrical, Blower, and Safety Controls
An HVAC technician should inspect wiring, electrical connections, the blower motor, belts, capacitors, and other moving components. They should also test the limit switch, flame sensor, pressure switch, and system shutdown controls. These components help your furnace operate safely and stop when dangerous conditions develop. Any issues with worn wiring or failing sensors should be repaired before the heating season begins.
Signs Your Furnace Needs Attention Now
If your furnace is showing signs of a problem, don’t wait for a scheduled tune-up to address it. Continuing to run a malfunctioning system can increase your energy usage, worsen equipment damage, or create a safety risk. Contact a qualified HVAC professional if you notice:
- Reduced heating output: The furnace runs, but rooms remain cold or take much longer to warm.
- Banging, rattling, or squealing noises: New or worsening sounds that may point to loose, damaged, or worn components.
- Short cycling: The system frequently starts and stops without completing a full heating cycle.
- Sudden spike in energy bills: Higher usage without a clear change in weather or household habits suggests that the furnace is working harder than usual.
- Gas smell or burning odor: Leave home and contact the gas utility or emergency services if you suspect a gas leak.
- Yellow or flickering pilot light: Can result from improper combustion or ventilation.
- Carbon monoxide detector alarm: Leave the property immediately and contact emergency services from a safe location.
Ready to Get Your Furnace Winter-Ready?
A furnace tune-up can help prepare your system for colder weather, but the process involves more than replacing a filter. Maintaining your system at home alongside annual professional inspections helps give your furnace the attention it needs before larger issues arise.
Agway can play an important role in keeping your heating system ready before temperatures fall. If you suspect your furnace needs a repair, contact Agway to see if work is covered before scheduling a service.


